 |
More!- Coal Mine, Forest of Dean - |
 |
|
These photographs show timbering that is at the other end of the size scale to the Wieliczka mine. Here, the timbers at the workface are of the order of 2 ft long at the most, the access road timbers are about 5 ft at the most. Before starting on the photographs, a few words about coal and metal mining may be in order. The Blurb So, how was it done? Two drifts were driven to intersect the coal seam. These were sufficiently high to accommodate a waggon. On reaching the seam, coal between the drifts was removed to create a working face. In this mine the floor was clay (fire clay) and the roof was a hard shale. The coal was removed by undercutting the seam, using a narrow pick to dig out a thin band of clay below the coal. Wedges could then be driven in between the top of the coal and the roof to break the coal out. This produced large sized lumps, which were good for house coal. The coal face was kept as low as possible, preferably just the width of the seam. Because of the dip of the seam, the broken coal tended to run down the face towards the lower drift and here it was loaded into the waggon, then hauled to the surface. Once the miner reached the upper end of the face, he started again working at the bottom. As the face advanced, short props were fitted to support the roof. When the coal face had advanced sufficiently far, the drifts at each end of the face were extended by ripping the shale roof (sometimes also the floor) to the height of the drift. The inside walls of each drift had to be packed solidly with stone and/or solid timber blocks for stability. The remainder of the unsupported roof would collapse sooner or later, depending on the strength of the strata. |
|
|
In the Forest of Dean, the coal seams reached the surface (outcrop), where they appeared as a dark staining to the soil. The Forest coal seams tended to be narrow and steeply inclined. This made them unsuitable for mechanised mining but quite suited to hand methods. In the Forest, a tradition of "free mining" grew up and some coal was mined here by small groups of free miners. The photographs on this page were taken in the early 1970s at a mine worked by two brothers, one underground and the other on the surface. |
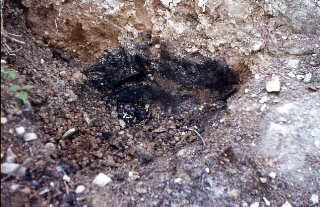 The coal outcrop |
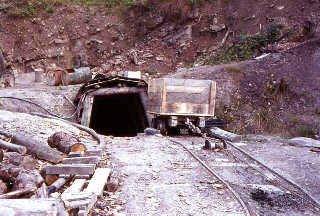 The lower (haulage) drift The haulage drift connects with the lower end of the seam. |
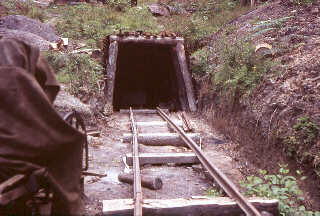 The upper drift As is obvious from the state of the sleepers, this track was not used for coal haulage, but it could be used for light loads. (A spare haulage engine is under the tarpaulin on the left). |
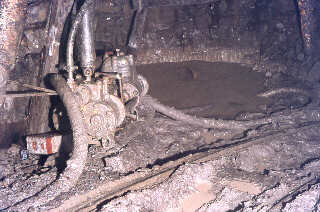 The end of the haulage drift, the sump and pump. This is the lowest point of the mine. All percolation water collects here before being pumped to the surface. Just to the right of this photograph is the loading point for the haulage waggons. The broken coal has rolled down to here from higher up the face. |
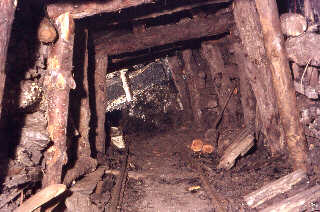 The end of the upper drift, looking into the coalface The left hand wall of this drift is reinforced with stone packing. The inclined coalface can be seen at the end of the drift. |
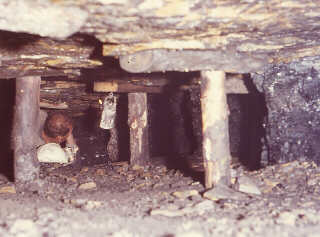 Getting the coal Looking down the coalface. Note the narrowness of the seam and the cramped working conditions. Note also the use of carbide lamps. The mine was shallow and there were no problems with gas so naked flames were allowed. |
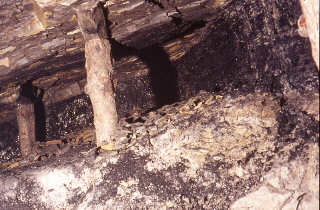 The coalface This is the upper end of the coal face, at the junction with the upper drift. Note the wooden props with half round wood bars on top. Also note that that props are underset, i.e., neither vertical nor perpendicular to the strata. (See diagram below). |
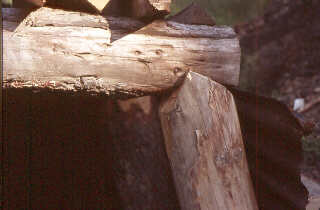 The timber notch An unequal angle notch is used. This resists pressure from the roof and the sides. Pressure on the timbers causes them to distort and makes the joint tighter and more secure. |
 Timber prop underset ( From 'Strata Control', © NCB 1972 ) |
|
|
Revised:
![]()